I just finished my third flight suit diaper bag! This one is for my friend Stephanie. Her husband is in the same squadron as my husband and they just had their fourth kid, a boy named Griffin! (I say *just* had a kid, but he was born in September, so I feel a little guilty that I didn't finish this bag sooner. Oh well! They'll still get a lot of use out of it.)
She wanted an adjustable, clip-on messenger bag strap, so I used the D-ring hardware from another bag and she can add the strap later when she finds the right one.
She also wanted a pocket with a flap so she could keep her keys or phone in the outside pocket for easy access. I used the same flap installation method as my Noodlehead Cargo Duffle and it turned out great!
The magnet clasp was really strong, so I hope that doesn't make it too difficult to open.
There is a long pocket on the inside front of the bag for a changing pad.
The inside of the bag is lined with iron-on vinyl so it will be easy to wipe out if it gets wet.
Here are some pictures of the changing pad. I used the velcro from the wrists of the uniform for the closure.
If I'm being totally honest, there are some minor mistakes with this bag that I REALLY wish I could fix, but it was too late and I just have to live with them. It's just hard to deal with sometimes because you know your name is attached to this bag and you want it to look good.
The first mistake is here on the edge. When I was stitching the lining to the outside of the bag, I didn't catch the edge of the green fabric and you can see the black foam and the raw edge of the fabric. The topstitching should keep everything in place, but I'm frustrated that I didn't notice this until AFTER I had flipped everything right side out and stitched the lining closed. There's also a little folded over crease in the flap.
The other issue is here where the topstitching kind of got away from me and went crooked. Granted, it's hard to wrestle the bag through the machine when there's so much bulk, but I didn't realize just how far off it got until the bag was done. And again, it was too late to go back and fix it. Those stitches are so close together, it would be nearly impossible to rip them out.
I realize these are minor mistakes that most people wouldn't notice, but I knew how much Stephanie wanted this bag customized to her needs, and again, it has my name on it, so I really wanted it to look good. As long as it's functional, I guess that's all that matters. I just have to remind myself of what my Dad always says: "Perfect is the enemy of good enough."
Showing posts with label baby. Show all posts
Thursday, February 25, 2016
Tuesday, October 6, 2015
Flight Suit Diaper Bag: Round Two!
I'm back with another flight suit diaper bag! This one is for one of the wives in our squadron who is going to give birth any day now to a baby girl. This project is so fun and special because I get to use the dad's flight suit to make the bag. I hope she enjoys using it as much as I enjoyed making it! (If you'd like to read about the first flight suit diaper bag I made, click here.)
All of the zippered pockets are still totally functional. There is no shortage of storage with this bag! This former leg pocket is now the back of the bag.
Here is a view of the flap. I found this adorable fabric at a great quilt shop in Watkins Glen when we went on vacation in August.
This is the view of the inside front of the bag with the flap open.
Here is a view of the inside pockets. If you look closely, you can see that I used an iron-on vinyl for the inside surface so it could easily be wiped down in case anything leaked inside.
These side pockets are great for water bottles or baby bottles.
Overall I didn't have any major problems putting this bag together. I realized after it was done that I had forgotten to add on one extra piece of velcro on the side so you could add an extra patch, but it was purely a cosmetic feature and the bag looks fine without it.
Let me know if you've ever made anything out of a uniform or if you've seen a similar flight suit diaper bag out there! I'd love to see pictures. :)
All of the zippered pockets are still totally functional. There is no shortage of storage with this bag! This former leg pocket is now the back of the bag.
Here is a view of the flap. I found this adorable fabric at a great quilt shop in Watkins Glen when we went on vacation in August.
This is the view of the inside front of the bag with the flap open.
Here is a view of the inside pockets. If you look closely, you can see that I used an iron-on vinyl for the inside surface so it could easily be wiped down in case anything leaked inside.
These side pockets are great for water bottles or baby bottles.
Overall I didn't have any major problems putting this bag together. I realized after it was done that I had forgotten to add on one extra piece of velcro on the side so you could add an extra patch, but it was purely a cosmetic feature and the bag looks fine without it.
Let me know if you've ever made anything out of a uniform or if you've seen a similar flight suit diaper bag out there! I'd love to see pictures. :)
Wednesday, August 19, 2015
Wonky Rectangles Baby Quilt
Back with another finished quilt (and I have ANOTHER quilt that I'll be posting about in the next few days)!
My cousin's wife recently had a baby and they waited until the baby was born to find out the gender (I love that idea!). Luckily the baby was a girl, because these colors definitely read more "girly" than I originally thought when I picked them out. Haha. :) But I had a lot of fun making this quilt and I can't wait to send it to the newest member of our extended family, Selah Grace Saville!
I love the way the big, random rectangles accent the patterns in the fabric so well.
The proportions turned out a little bit different than I was expecting, but it looks great even if you turn it vertically, so there's no right or wrong way to do it. :)
I visited a new (amazing) quilt store called Rock, Paper, Scissors in Montclair, NJ and that's where I found this perfect backing fabric. It's a cream color with peach/salmon accent lines. SO great!
I machine-stitched the binding instead of hand sewing it so it would be extra durable and hold up to lots of repeat washings.
Welcome to the world, Selah! Can't wait to meet you!
My cousin's wife recently had a baby and they waited until the baby was born to find out the gender (I love that idea!). Luckily the baby was a girl, because these colors definitely read more "girly" than I originally thought when I picked them out. Haha. :) But I had a lot of fun making this quilt and I can't wait to send it to the newest member of our extended family, Selah Grace Saville!
I love the way the big, random rectangles accent the patterns in the fabric so well.
The proportions turned out a little bit different than I was expecting, but it looks great even if you turn it vertically, so there's no right or wrong way to do it. :)
I visited a new (amazing) quilt store called Rock, Paper, Scissors in Montclair, NJ and that's where I found this perfect backing fabric. It's a cream color with peach/salmon accent lines. SO great!
I machine-stitched the binding instead of hand sewing it so it would be extra durable and hold up to lots of repeat washings.
Welcome to the world, Selah! Can't wait to meet you!
Friday, May 29, 2015
Aviation Inspired Baby Quilt
Hello friends! Just wanted to drop in and share my latest finished project. :)
Some friends of ours are having a baby and they both happen to be pilots, so when I stumbled across this pattern called "In Formation" using "flying geese" blocks, I just knew it was the one I had to make. I used leftover fabric from my sister's wedding quilt (recognize those colors?), and used some fat quarters to make a scrappy backing. I took some pictures in our beautiful, blooming, GREEN front yard. Enjoy!
This picture cracks me up because it looks like Wes could be naked underneath. Haha. ;)
Quilting detail. I like how it looks like swirling air and clouds.
And I've been dying to use this "mice in race cars" fabric ever since I bought it way back when, so a baby boy's quilt seemed like the perfect opportunity.
Our friends should be receiving this quilt any day now. I can't wait to hear what they think!
Some friends of ours are having a baby and they both happen to be pilots, so when I stumbled across this pattern called "In Formation" using "flying geese" blocks, I just knew it was the one I had to make. I used leftover fabric from my sister's wedding quilt (recognize those colors?), and used some fat quarters to make a scrappy backing. I took some pictures in our beautiful, blooming, GREEN front yard. Enjoy!
This picture cracks me up because it looks like Wes could be naked underneath. Haha. ;)
Quilting detail. I like how it looks like swirling air and clouds.
Scrappy backing!
I love this fabric that gives step-by-step directions on how to make a paper airplane. How perfect is that?And I've been dying to use this "mice in race cars" fabric ever since I bought it way back when, so a baby boy's quilt seemed like the perfect opportunity.
Our friends should be receiving this quilt any day now. I can't wait to hear what they think!
Thursday, January 29, 2015
Boho Baby Quilts
This week, I finished two baby quilts and today I was finally able to get some pictures of them. Now I can post them in my Etsy shop (and on the blog, of course!).
I used the Indian Summer fabric line from Art Gallery Fabrics (plus a few solids) and this was my first experience sewing equilateral triangles. Confession: this was originally one long, skinny, awkwardly proportioned quilt top AND I've had it completed for almost two years now! I pulled it out recently and knew I couldn't make it work as a regular sized quilt, so I chopped it in half and voila! Two awesome baby quilts!
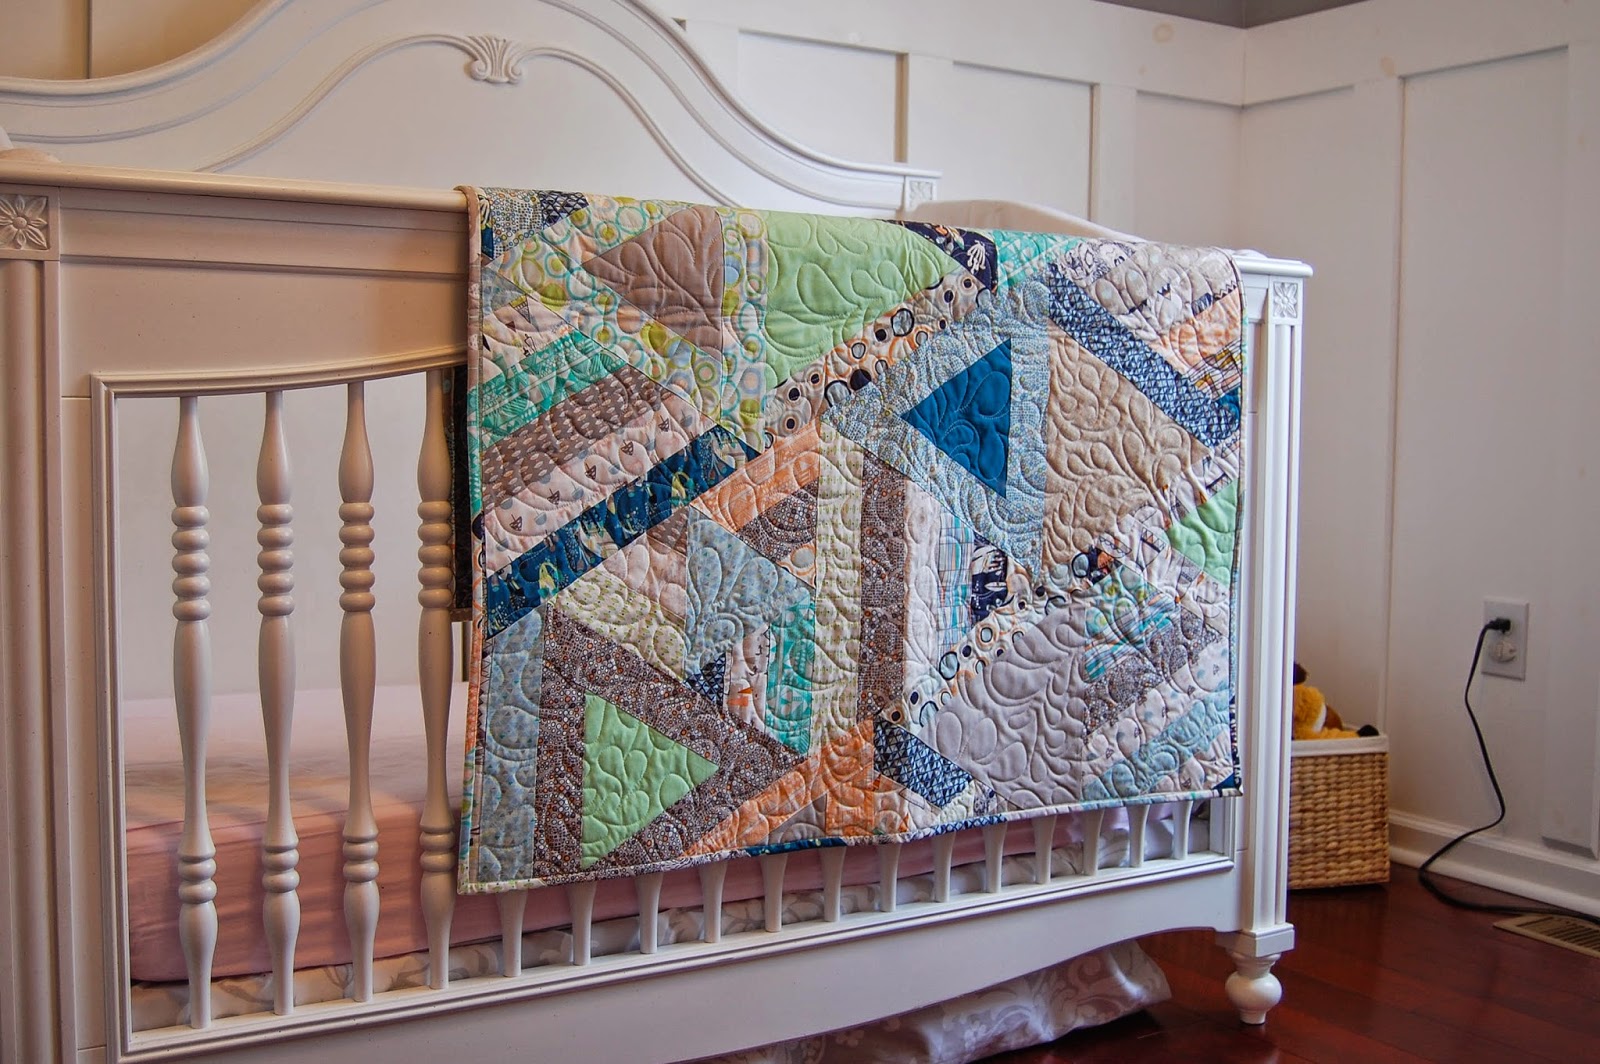
I also wanted to "set the stage" and get some pictures of these quilts in an actual kid's room, so I asked my friend Michelle if I could come over and take some pictures of the quilts hanging over the edge of her daughter's crib. I love the way the longarm quilting adds so much texture and movement!
I used the Indian Summer fabric line from Art Gallery Fabrics (plus a few solids) and this was my first experience sewing equilateral triangles. Confession: this was originally one long, skinny, awkwardly proportioned quilt top AND I've had it completed for almost two years now! I pulled it out recently and knew I couldn't make it work as a regular sized quilt, so I chopped it in half and voila! Two awesome baby quilts!
I also wanted to "set the stage" and get some pictures of these quilts in an actual kid's room, so I asked my friend Michelle if I could come over and take some pictures of the quilts hanging over the edge of her daughter's crib. I love the way the longarm quilting adds so much texture and movement!
Let me know what you think of the final product! Have you ever made a quilt pattern using equilateral triangles before? (I would do it again in a heartbeat!)
Subscribe to:
Posts (Atom)